This headband really is easy to make! Read on, I'll show
you how, step-by-step!
 |
Cut 2 pieces of fabric 2"x 20". You can use just about any
type of fabric, with the exception of anything really light-
weight. Medium-weight fabrics work best; I chose some
left-over taffeta I used to make my daughter a skirt out of. |
 |
| Pin WRONG sides together (good side facing out). |
 |
| Stitch about 1/4" from edges. |
 |
Slip each end of your elastic inside each end of the
headband.The elastic should be between and long. |
 |
| Pin elastic in place. |
 |
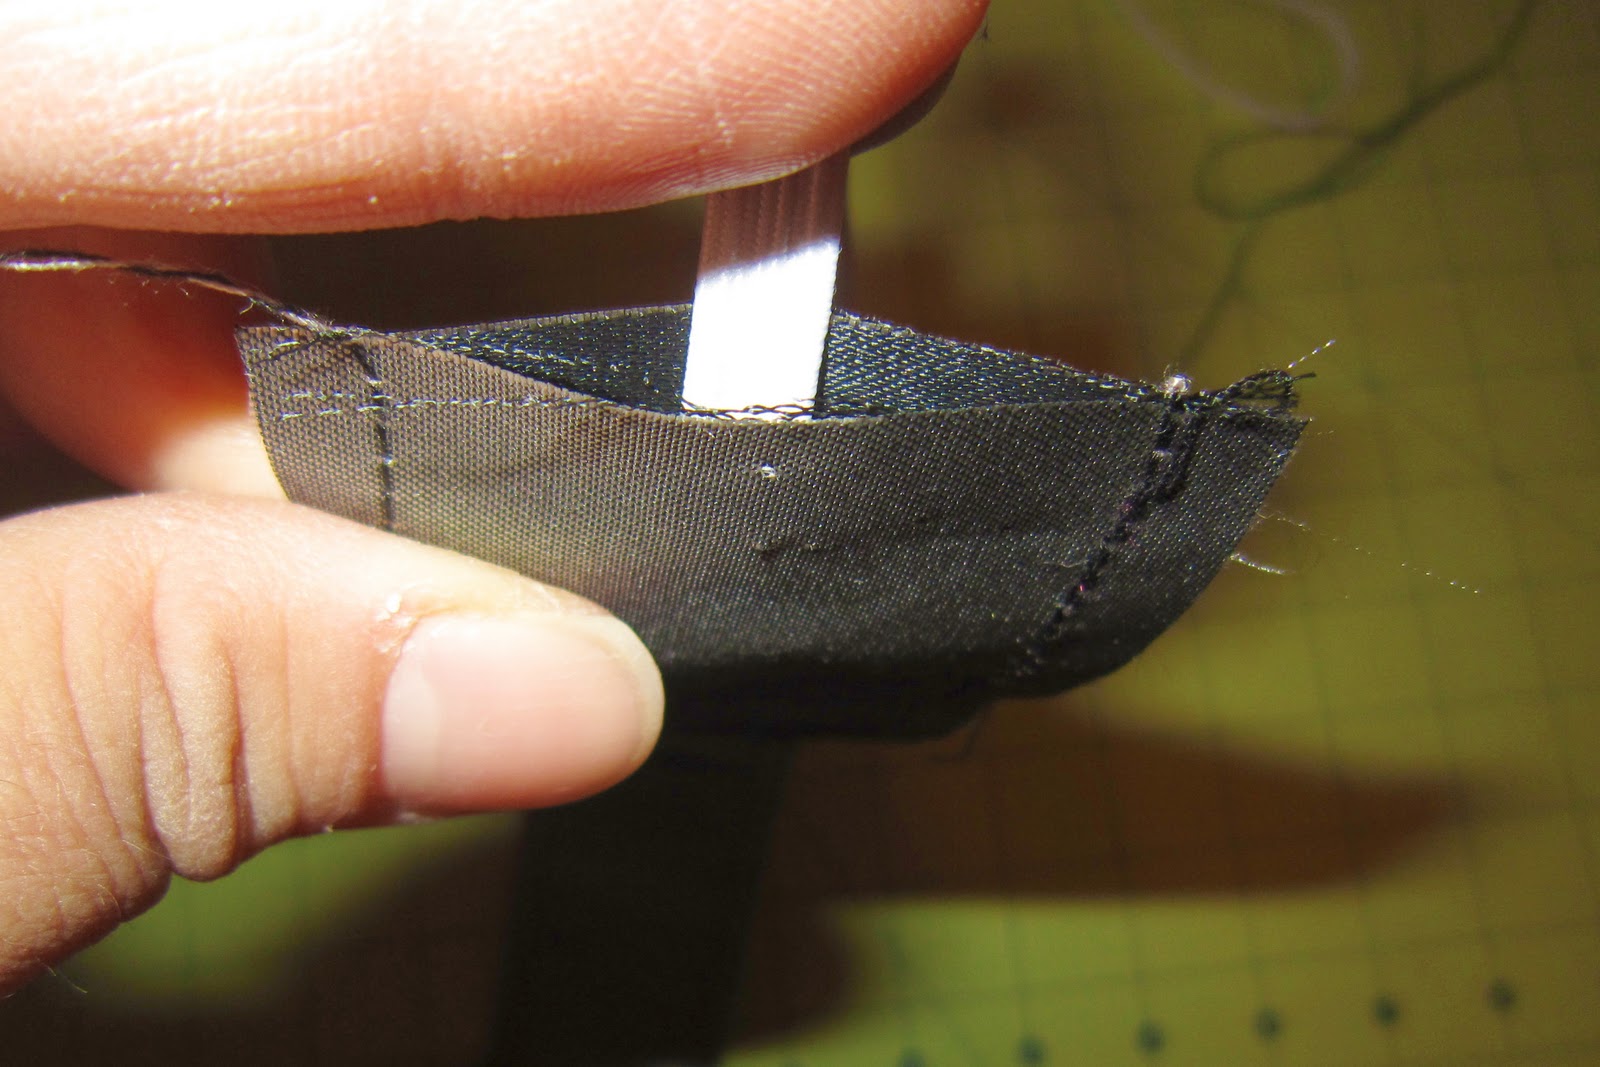
| Cut corners off diagonally. |
 |
| Sew along diagonal edges. This is what your headband should look like. |
 |
Now, on to the flower.
Take a remaining piece of scrap fabric... |
 |
| Twist. Nothing technical, just twist it up. |
 |
| Glue edge down on a piece of felt. |
 |
| Glue in a spiral while continuing to twist. |
 |
We're almost done! As you get close to
the end, start gluing the rosette
to itself rather than the felt. |
 |
Trim felt around edges a little smaller than the
rosette so the felt won't be visible from the front. |
 |
| Glue on to the headband slightly to one side. |
 |
| Here's the side view. FINISHED. |
 |
Here's my lil' girl modeling her cute new headband!
Cute, huh? I even borrow it from her sometimes!
Warning: Once you've made this, you'll
want to make one for every outfit! |
|


1 comment:
this is such a cute band.. :)
Love
Hani
http://craftionary.blogspot.com
Post a Comment